


Can You Lay Paving Over Concrete? Yes — If You Do It Right
Yes — you can lay paving slabs directly over existing concrete if the concrete is structurally sound, level, and free of major cracks. The concrete acts as your sub-base. Clean it, prime it with SBR, lay a full mortar bed, and install the paving on top. This saves the cost and labour of excavation and sub-base preparation. But if the concrete is cracked, uneven, or sinking, laying over it will fail — the problems underneath transfer straight through to your new paving.
This is one of the most searched paving questions in the UK — and the answer is almost always "yes, but..." The method works. Thousands of patios sit on concrete bases with no problems. But the condition of the existing concrete determines everything. Here's how to check, how to do it, and when to rip it up instead.
When laying over concrete works
1. Structurally sound: No large cracks, no sections that move when you stand on them, no hollow-sounding areas when tapped with a hammer. Hairline surface cracks (under 2mm) are fine — they don't affect the structural integrity.
2. Reasonably level: Minor undulations (under 10mm over 2 metres) can be corrected with the mortar bed thickness. Major slopes or dips need addressing first — either with a self-levelling compound or by building up the mortar bed, which adds weight and cost.
3. Not sinking or moving: If the concrete has sunk at one end or tilted visibly since it was laid, the ground underneath is unstable. Laying paving on top won't fix this — it'll sink too.
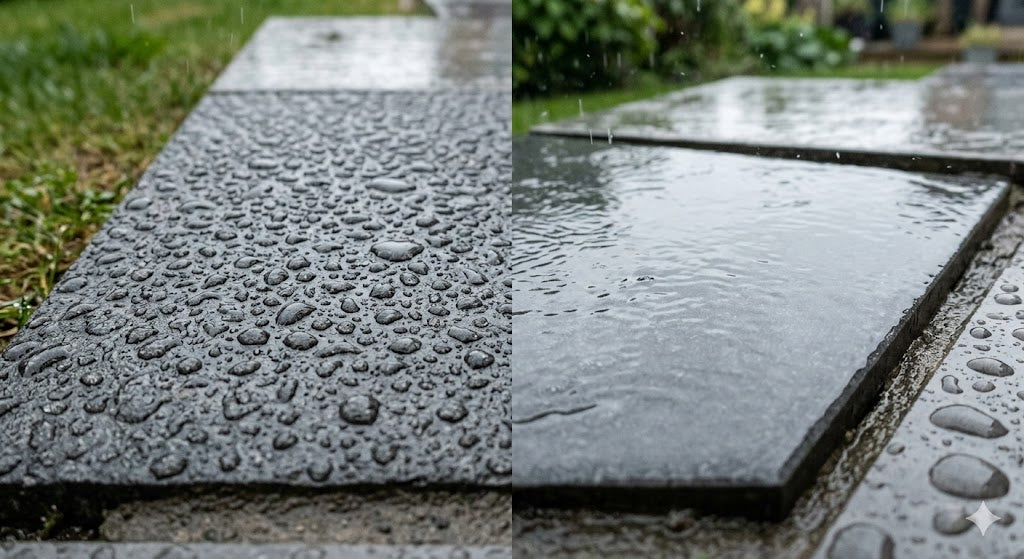
4. Adequate drainage: The concrete should slope away from the house (1:80 gradient minimum). If it puddles after rain, your new paving will puddle too. You'll need to address drainage before overlaying.
When to rip up the concrete instead
Large cracks running through: Cracks wider than 5mm or cracks that go all the way through the slab indicate structural failure. The concrete has already broken — paving on top will crack along the same lines within 12-24 months.
Sections have sunk or lifted: If parts of the concrete are at different levels (stepped edges, sunken corners), the ground underneath has moved. This will continue to move and take your new paving with it.
The surface is crumbling: If the concrete breaks apart when you hit it with a hammer or the surface flakes off in chunks, the concrete mix was poor or it's frost-damaged beyond repair. It won't support paving reliably.
Height is a problem: Paving over concrete adds approximately 40-50mm to the finished level (20mm mortar + 20mm slab). If this brings the patio above your damp-proof course (DPC), above door thresholds, or creates drainage issues, you need to remove the concrete and start lower.
Drainage slopes the wrong way: If the concrete slopes toward the house, overlaying with paving makes the problem worse. Remove it, re-grade the sub-base, and start fresh.
Step-by-step: laying paving over concrete
What you need
Materials: Paving slabs (sandstone or porcelain), sharp sand, cement (or pre-mixed paving mortar), SBR primer, jointing compound, water.
Tools: Stiff brush, pressure washer (optional), bucket, mixing trowel or drill paddle, notched trowel or laying trowel, spirit level, rubber mallet, string line, knee pads, angle grinder with diamond blade (sandstone) or diamond wet cutter (porcelain).
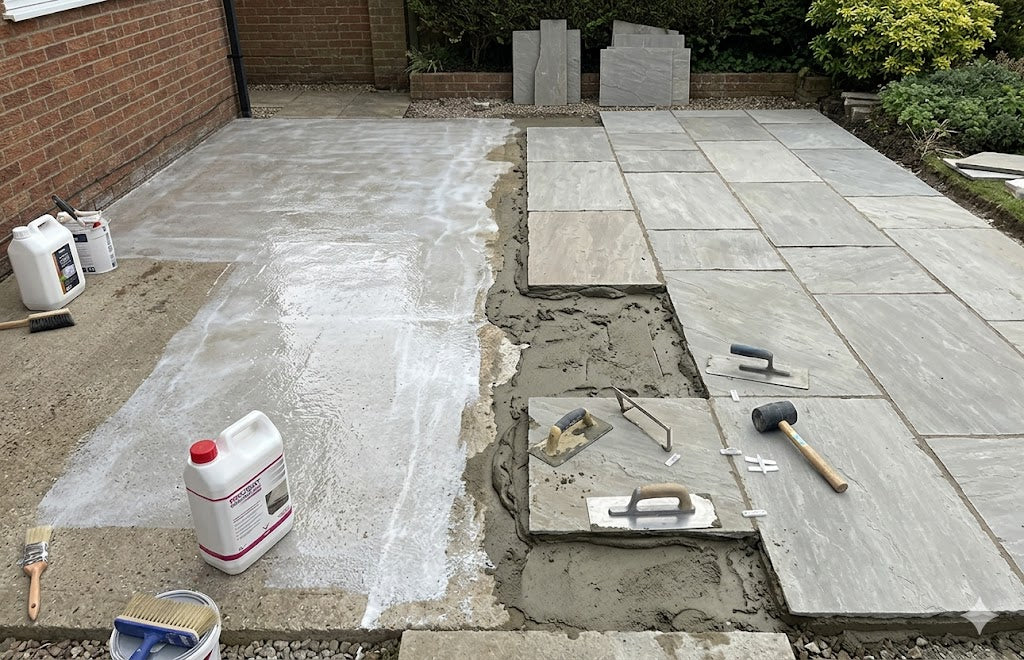
Step 1: Clean the concrete thoroughly
Remove all dirt, moss, algae, oil stains, paint, and loose material. A pressure washer is ideal. Any contamination on the surface prevents the mortar from bonding properly. Pay particular attention to edges and corners where debris collects. Let the concrete dry before proceeding — the surface should be clean but not wet when you apply the primer.
Step 2: Prime with SBR
This is the step that most DIY guides skip — and the reason most concrete overlays fail. Apply a coat of SBR bonding agent (diluted per manufacturer's instructions, typically 3:1 water to SBR) to the entire concrete surface using a brush or roller. The SBR creates a chemical bond between the old concrete and the new mortar bed. Without it, the mortar sits on top of the concrete without actually sticking — and separates over time, causing slabs to rock and lift.
Wait until the SBR becomes tacky (not fully dry) before laying the mortar bed.
For porcelain paving: you need SBR on BOTH surfaces — on the concrete base AND on the back of each porcelain slab. Porcelain is non-porous, so mortar won't bond to it without SBR priming. Double priming is essential for porcelain over concrete. Read our jointing compound guide for more on porcelain installation requirements.
Step 3: Prepare the mortar bed
Mix a semi-dry mortar at a 5:1 ratio (5 parts sharp sand to 1 part cement) or use a pre-mixed paving mortar. The consistency should be firm enough to hold its shape when squeezed but moist enough to compact without crumbling. Add a capful of SBR to the mixing water for extra bond strength.
Spread the mortar onto the primed concrete to a depth of approximately 20-30mm. Use enough to create a full bed — never spot-bed (5 blobs of mortar). Spot-bedding on concrete is the most common cause of cracked slabs because unsupported areas flex under foot traffic.
Step 4: Lay the paving slabs
For sandstone: prime the back of each slab with neat SBR (optional but recommended for maximum bond).
For porcelain: prime the back of each slab with neat SBR (mandatory — the mortar will not bond without it).
Place each slab onto the mortar bed and tap into position with a rubber mallet. Check levels constantly with a spirit level — maintain the drainage fall away from the house. Leave consistent joint gaps between slabs (8-12mm for sandstone, 3-5mm for porcelain).
Step 5: Point the joints
Wait 24-48 hours for the mortar bed to set before pointing. Use Ultrascape Flowpoint (£55/tub) for sandstone or Ultrascape Porcelpoint (£50/tub) for porcelain. Follow our jointing compound application guide for the full method.
4 mistakes that ruin concrete overlays
Without SBR, the mortar bed doesn't bond to the concrete — it just sits on top. Within 6-12 months, water gets between the layers, frost heaves the mortar off the concrete, and slabs start rocking. SBR costs approximately £10-15 for enough to prime a 20m² patio. Skipping it to save £10 ruins a £2,000+ project.
Spot-bedding (5 blobs of mortar per slab) leaves 70% of the slab unsupported. On soil-based sub-bases, the ground gives slightly and it sometimes works. On rigid concrete, there's no give — the unsupported areas flex under foot traffic and crack within months. Full mortar bed, every time, no exceptions.
Paving over concrete adds 40-50mm to the finished level. If this brings the surface above your damp-proof course, moisture can bridge into your house walls — causing damp problems that cost thousands to fix. Check the DPC line (usually visible as a horizontal line in the mortar between bricks, approximately 150mm above ground level). Your finished paving must be at least 150mm below it.
Cracks in concrete don't heal — they get worse. Temperature changes, moisture, and frost expand the cracks over time. Any paving laid over cracked concrete will eventually crack along the same lines. If the concrete is cracked, remove the damaged sections and repair with fresh concrete, or remove it entirely and lay a proper MOT Type 1 sub-base.
How much does it cost?
Laying over concrete is significantly less expensive than a full build because you skip excavation and sub-base preparation:
| Item | Over concrete (20m²) | Full build (20m²) |
|---|---|---|
| Excavation + skip hire | £0 (saved) | £400-500 |
| Sub-base (MOT Type 1) | £0 (saved) | £150-250 |
| SBR primer | £10-15 | £10-15 |
| Mortar / sand / cement | £80-120 | £80-120 |
| Paving slabs (sandstone) | £400-460 | £400-460 |
| Jointing compound | £55-110 | £55-110 |
| Total (DIY) | £545-705 | £1,095-1,455 |
Laying over concrete saves approximately £500-750 on a 20m² patio by eliminating excavation, skip hire, and sub-base materials. For exact costs based on your dimensions, use our patio cost calculator.
Ready to start?
Browse sandstone and porcelain paving — all prices include VAT and free UK delivery.
Browse Paving Slabs Order SamplesFrequently asked questions
Can you lay paving slabs directly on concrete?
Yes — if the concrete is structurally sound, level, and not sinking. Clean the surface, prime with SBR bonding agent, lay a full mortar bed (20-30mm), and install the paving on top. The concrete acts as your sub-base, saving excavation and sub-base costs.
Do I need to remove old concrete before laying paving?
Only if the concrete is cracked, sinking, crumbling, or slopes toward the house. Sound concrete is actually a better base than a freshly laid sub-base — it's already compacted and settled. Remove it only when it's structurally compromised.
What mortar mix for laying paving on concrete?
5:1 ratio — 5 parts sharp sand to 1 part cement, mixed to a semi-dry consistency. Add a capful of SBR bonding agent to the mixing water for stronger adhesion to the concrete base. Apply as a full mortar bed (20-30mm deep), never spot-bed on concrete.
Will paving over concrete cause damp?
Only if the finished level rises above your damp-proof course (DPC). Paving over concrete adds approximately 40-50mm to the height. Check that the finished surface stays at least 150mm below the DPC line — visible as a horizontal mortar joint between bricks, typically 2-3 brick courses above ground level.
Can I lay porcelain over concrete?
Yes — but porcelain requires SBR primer on BOTH the concrete base AND the back of each slab. Porcelain is non-porous, so standard mortar won't bond to it without priming. Skip the SBR on either surface and the slabs will debond within 12-24 months.
How long does paving over concrete last?
If the concrete base is sound and the paving is installed correctly with SBR primer and a full mortar bed, it should last 20+ years — the same as paving installed on a traditional sub-base. The concrete base is often more stable than a freshly laid sub-base because it's already fully settled.
