


Jointing Compound for Paving: What It Is, Which to Use, and How to Apply It
Jointing compound is a pre-mixed material used to fill the gaps between paving slabs after they're laid. It replaces traditional sand-and-cement pointing, sets harder, resists weed growth, and won't wash out in rain. For porcelain paving, use a flowable grout like Ultrascape Porcelpoint (£50/tub). For natural stone (sandstone, limestone, granite, slate), use Ultrascape Flowpoint (£55/tub). One tub covers approximately 10-15m² depending on slab size and joint width.
Jointing compound is the last thing you apply to a patio — and the first thing people notice when it goes wrong. Grey smears across the slab face, crumbling joints after six months, or weeds pushing through within a year. All avoidable if you use the right product and follow the method. This guide covers which jointing compound to use for your paving type, how much you need, and the step-by-step application process.
What is jointing compound?
Jointing compound is a pre-mixed, polymer-modified material designed to fill the joints between paving slabs. It's the modern replacement for traditional sand-and-cement pointing, which cracks, crumbles, and allows weed growth within a few years.
Good jointing compound sets to a firm, durable finish that resists rain washout, inhibits weed and moss growth, and stays intact for 10+ years. It's available in different formulations for different paving types — the compound you use on porcelain is not the same as the one you use on sandstone.
Which jointing compound do I need?
The two products are designed for different paving materials. Using the wrong one causes problems — staining on natural stone, poor adhesion on porcelain, or discolouration that won't come off.
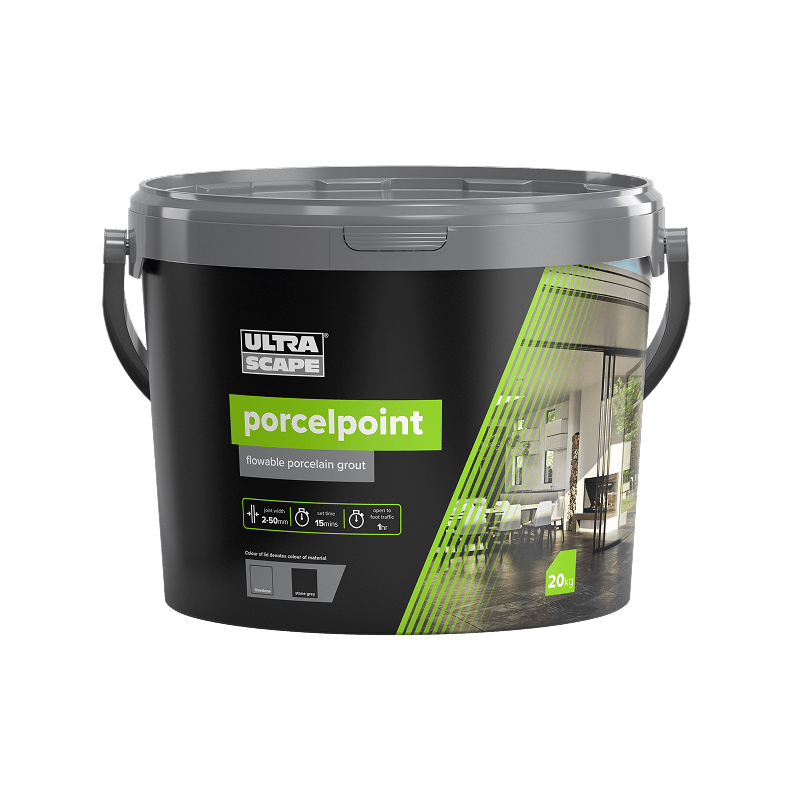
Flowable porcelain grout specifically formulated for non-porous porcelain slabs. Pours into joints as a liquid and self-levels, filling tight 3-5mm porcelain joints completely without air pockets. Won't stain or discolour porcelain surfaces. Sets to a smooth, hard finish that matches the precision of porcelain edges.
Use for: All porcelain paving, including 20mm outdoor slabs, porcelain edging planks, and porcelain bullnose copings.
Joint width: 3-10mm
Coverage: Approximately 10-15m² per tub (depends on joint width and slab size)
Buy Porcelpoint →
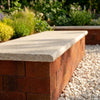
Brush-in jointing compound designed for natural stone — sandstone, limestone, granite, and slate. Charcoal colour blends naturally with most stone tones. Inhibits weed growth, resists rain washout, and allows the stone's natural colour variation to remain the visual focus rather than bright white or contrasting joint lines.
Use for: Indian sandstone (riven and sawn), limestone, granite slabs, slate, and sandstone setts/cobbles.
Joint width: 5-15mm
Coverage: Approximately 8-12m² per tub (natural stone has wider joints = more compound needed)
Buy Flowpoint →
Common mistake: Using Flowpoint (brush-in compound) on porcelain paving. Brush-in compounds can leave residue on porcelain's smooth, non-porous surface that's extremely difficult to remove. Always use a flowable grout (Porcelpoint) on porcelain. Conversely, flowable grout on wide-jointed natural stone can look too uniform and artificial — Flowpoint's brush-in application gives a more natural finish on stone.
How much jointing compound do I need?
The amount depends on three things: your patio area, your slab size (fewer large slabs = fewer joints = less compound), and your joint width.
Quick guide:
| Patio Size | Porcelain (Porcelpoint) | Natural Stone (Flowpoint) |
|---|---|---|
| 10m² | 1 tub (£50) | 1 tub (£55) |
| 15-20m² | 1-2 tubs (£50-£100) | 2 tubs (£110) |
| 25-30m² | 2 tubs (£100) | 2-3 tubs (£110-£165) |
Natural stone patios use more compound than porcelain because the joints are wider (8-12mm vs 3-5mm) and the riven surface creates deeper joint channels. Always buy one extra tub rather than running short mid-application — you can't stop and restart easily once the compound starts setting.
How to apply jointing compound — step by step
Before you start
Wait at least 24-48 hours after laying the slabs before applying jointing compound. The mortar bed needs to set first. Choose a dry day with no rain forecast for at least 4-6 hours after application. Temperature should be above 5°C. Sweep the joints completely clean — remove all loose mortar, dust, and debris. The joints must be dry and free of standing water.
Applying Porcelpoint (porcelain paving)
Step 1: Ensure joints are clean, dry, and at least 25mm deep. Dampen the porcelain surface lightly with a fine mist — this helps the grout flow but the joints themselves must be dry.
Step 2: Mix the Porcelpoint according to the tub instructions until it reaches a smooth, pourable consistency. It should flow freely but not be watery.
Step 3: Pour the mixed grout onto the patio surface and work it into the joints using a squeegee, pushing the grout firmly into every gap. Work in sections of 3-4m² at a time.
Step 4: Once the joints are filled, use the squeegee to remove excess grout from the slab surfaces. Work diagonally across the joints to avoid pulling grout back out.
Step 5: After 15-20 minutes (when the grout begins to firm up), wipe the slab surfaces with a damp sponge to remove any haze. Don't flood the joints with water — gentle wiping only.
Step 6: Allow 24 hours to fully cure before walking on the patio. Keep it dry during this period if possible.
Applying Flowpoint (natural stone)
Step 1: Ensure joints are clean, dry, and at least 25mm deep. Pre-dampen the paving surface lightly to prevent the stone absorbing moisture from the compound too quickly.
Step 2: Tip the Flowpoint compound onto the paving surface. It comes pre-mixed — no water needed.
Step 3: Sweep the compound into the joints using a stiff brush, working the material firmly into every gap. Use a pushing motion rather than sweeping across the surface — you want compound in the joints, not spread across the slab faces.
Step 4: Continue brushing until all joints are filled to within 2-3mm of the slab surface. Overfilling creates a raised joint that looks untidy and traps water.
Step 5: Sweep all excess compound off the slab surfaces immediately. Any compound left on the stone surface can stain. Pay particular attention to textured riven surfaces where granules can lodge in the natural pits and grooves.
Step 6: If rain is expected within 4 hours, cover the patio with plastic sheeting. Allow 24 hours before walking on it, 48 hours before heavy use.
5 mistakes that ruin most pointing jobs
Brush-in compound on porcelain leaves a haze that's nearly impossible to remove. Flowable grout on wide-jointed sandstone looks artificial and can crack as the stone moves slightly with temperature changes. Match the compound to the material — Porcelpoint for porcelain, Flowpoint for natural stone.
Jointing compound needs dry joints and a dry forecast. Moisture in the joints prevents proper adhesion. Rain within 4-6 hours of application washes the compound out before it sets, creating a mess on the slab surfaces and empty joints that need redoing. Check the weather forecast before you start.
Compound left on the slab surface for more than 20-30 minutes begins to set and becomes extremely difficult to remove — especially on textured natural stone where it lodges in the riven surface. Work in small sections (3-4m²) and clean as you go rather than filling the entire patio and then trying to clean up.
Jointing compound needs at least 25mm depth to bond properly. If your mortar bed has squeezed up into the joints during laying, scrape it back to 25mm depth before applying compound. Shallow joints (under 15mm) cause the compound to crack and pop out within months because there isn't enough material to create a strong bond.
The mortar bed under the slabs needs 24-48 hours to set before you apply jointing compound. If you point too early, the slabs can still shift slightly on the soft mortar bed, cracking the freshly applied compound. Patience at this stage saves having to redo the entire job.
Jointing compound vs sand and cement pointing
Jointing compound is more expensive upfront (£50-55 per tub vs £10-15 for sand and cement) but lasts 10-15 years without cracking, resists weed growth, and won't wash out in rain. Traditional sand-and-cement pointing costs less initially but typically cracks within 2-3 years, allows weed growth through the cracks, and needs repointing every 3-5 years. Over a 10-year period, jointing compound is the better value choice.
The other advantage of jointing compound is application speed. Traditional pointing is slow — you trowel wet mortar into each joint individually, tool the surface, and clean up. A 20m² patio takes 4-6 hours to point with sand and cement. The same patio takes 1-2 hours with brush-in compound. For DIYers, the time saving alone justifies the cost difference.
Buy jointing compound
Porcelpoint for porcelain (£50/tub) and Flowpoint for natural stone (£55/tub). In stock, delivered free with your paving order.
Buy Jointing Compound Browse Paving SlabsFrequently asked questions
What is the best jointing compound for paving?
For porcelain paving, use a flowable grout like Ultrascape Porcelpoint (£50/tub) — it pours into tight porcelain joints and self-levels without staining the surface. For natural stone (sandstone, limestone, granite, slate), use a brush-in compound like Ultrascape Flowpoint (£55/tub) — it fills wider joints naturally and blends with the stone colour.
How many tubs of jointing compound do I need?
One tub covers approximately 10-15m² on porcelain (narrow joints) or 8-12m² on natural stone (wider joints). For a typical 20m² patio, buy 2 tubs. Always order one extra tub rather than risking running short mid-application — you can't easily stop and restart once the compound starts setting.
Can I use jointing compound on Indian sandstone?
Yes — use a brush-in compound like Ultrascape Flowpoint, not a flowable porcelain grout. Brush-in compounds are designed for the wider joints (8-12mm) typical of sandstone paving and won't stain the natural stone surface. The charcoal colour blends naturally with most sandstone tones.
How long does jointing compound take to set?
Jointing compound begins to firm up within 15-30 minutes of application. It's firm enough to walk on after 24 hours and fully cured after 48 hours. Keep the patio dry during the first 4-6 hours — rain before initial setting will wash the compound out of the joints.
Does jointing compound stop weeds?
Yes — properly applied jointing compound creates a solid, impermeable joint that prevents weed seeds from germinating in the gaps between slabs. This is one of its main advantages over traditional sand-and-cement pointing, which cracks over time and allows weeds to grow through. No compound is 100% permanent — after 10+ years, some joints may need topping up in high-traffic areas.
Can I apply jointing compound in the rain?
No. Joints must be dry and there should be no rain forecast for at least 4-6 hours after application. Moisture prevents proper adhesion and rain washes uncured compound out of the joints, creating stains on the slab surfaces that are difficult to remove. If rain arrives unexpectedly, cover the patio with plastic sheeting immediately.
