


How to Lay Kandla Grey Porcelain 900x600: Complete Installation Guide
Right, let's get one thing straight from the start: laying Kandla Grey porcelain 900x600 is absolutely doable as a DIY project, but it's not the same as chucking down some old paving slabs on a sand bed and hoping for the best. Porcelain demands proper technique, the right materials, and a bit of patience.
That said, if you're reasonably handy and willing to follow the process properly, you can save yourself £1,500-2,500 in labour costs on a typical patio. This guide walks you through exactly how to do it right—no skipped steps, no dodgy shortcuts that'll come back to haunt you in two years.

Can You Actually DIY This? Honest Assessment
Before you crack on, ask yourself these questions:
Have you done any paving before? If you've laid natural stone or block paving successfully, you've got the fundamentals. Porcelain's just more precise.
Are you physically capable? Each 900x600mm slab weighs about 24-26kg. You'll be lifting, carrying, and positioning dozens of them. If your back's dodgy, hire help.
Do you have access to a wet cutter? Non-negotiable. You cannot cut porcelain dry without destroying both your lungs and the material. Hire one if you don't own one (about £40-60 for a weekend).
Can you work to tight tolerances? Porcelain shows every mistake. Wonky levels, inconsistent gaps, poor adhesive coverage—it all shows. You need to be methodical.
If you answered yes to most of these, crack on. If not, at least understanding the process helps you spot cowboys when getting quotes.

Tools and Materials: What You Actually Need
Essential Tools:
- Wet tile cutter (porcelain-grade blade, minimum 900mm cutting capacity)
- Spirit level (900mm minimum, ideally 1200mm)
- Notched trowel (10mm notches for porcelain adhesive)
- Rubber mallet (for bedding slabs without damage)
- Tile spacers (3-5mm depending on preference)
- Measuring tape and chalk line
- Bucket and mixing drill (for adhesive)
- Sponge and clean water (constant cleaning essential)
- Knee pads (trust me, you'll thank yourself)
- Safety gear (goggles, dust mask, gloves)
Materials Needed:
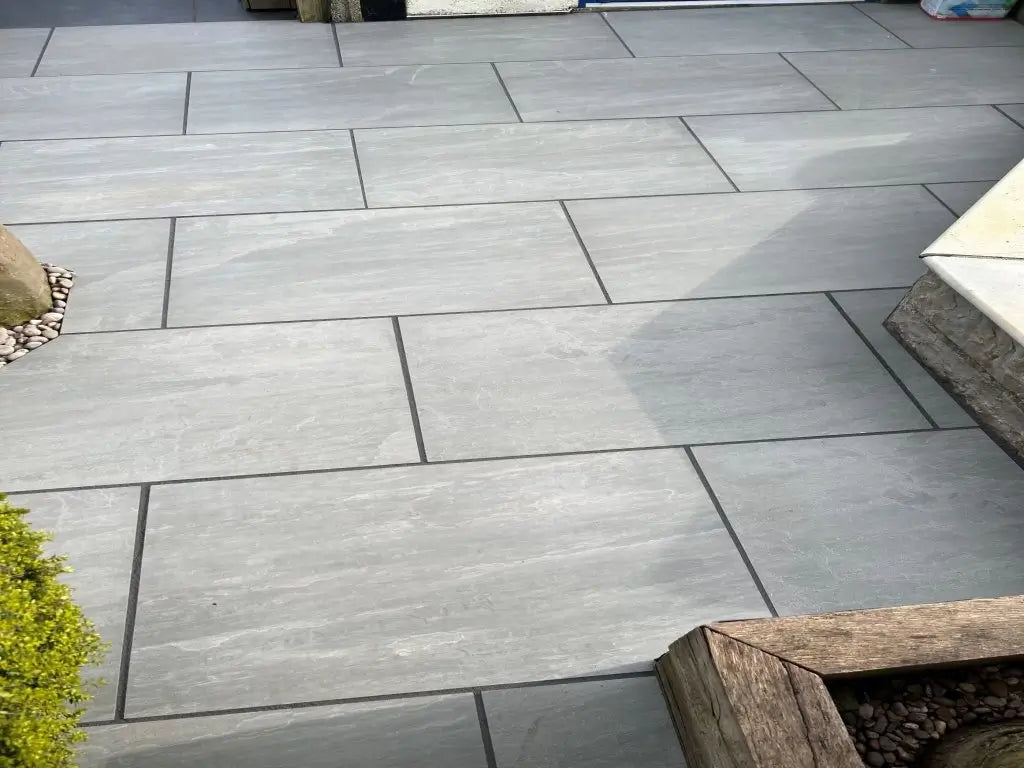
For a 30m² patio using Kandla grey porcelain 900x600:
- Porcelain slabs: 56 pieces (30m² ÷ 0.54m² per slab) + 10% wastage = 62 slabs
- Porcelain primer: 2-3 litres (for priming slab backs)
- Porcelain adhesive: 15-18 x 20kg bags (roughly 5-6kg per m²)
- Grout: 3-4 x 5kg bags of porcelain-specific grout
- Concrete base: If not already laid (100mm minimum thickness)
Cost breakdown for materials:
- Slabs from Universal Paving: 33m² × £19.55/m² = £645.15
- Primer: £40-60
- Adhesive: £180-270 (£12-15 per bag)
- Grout: £60-80
- Total materials: roughly £925-1,055
Compare that to £1,500-2,500 for professional installation and the savings are clear.
Step 1: Base Preparation (Don't Skip This)
Your base makes or breaks the job. Porcelain won't forgive a dodgy foundation.
You need a concrete base. Not MOT Type 1 hardcore. Not compacted sand. Concrete. Minimum 100mm thick, properly reinforced with steel mesh.
If you're starting from scratch:
- Excavate to required depth (typically 200-250mm total)
- Lay 100mm MOT Type 1, compact thoroughly
- Pour 100mm concrete with mesh reinforcement
- Create a fall of 1:80 minimum for drainage (away from buildings)
- Tamp and level the concrete surface
- Leave to cure for minimum 7 days (14 days ideal)
If you've got existing concrete:
Check it's sound—no major cracks, not flaking, properly level. Small cracks are fine; big structural issues need addressing first.
Clean it thoroughly. Pressure wash, remove all dirt, moss, oil stains. The adhesive needs a clean surface to bond.
Check your levels and falls. Use a long spirit level to confirm proper drainage gradient.
Step 2: Planning Your Layout
This saves you time, money, and heartache later.
Dry lay first. Before mixing any adhesive, lay out your slabs dry. Work out:
- Where cuts will fall
- Whether your pattern works
- If you need to adjust starting position to minimize cuts
Top tip: Start from the most visible area (usually where you view from the house) and work towards less prominent edges. This way any cut pieces end up at garden boundaries where they're less noticeable.
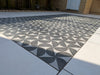
For 900x600mm slabs, common layouts:
Brick bond (running bond): Offset each row by 450mm (half the length). Most popular, looks professional, relatively easy.
Stack bond: Straight grid pattern. Very contemporary, but shows any levelling errors more obviously.
Mixed orientation: Alternating portrait/landscape. More complex but creates visual interest.
Mark your starting lines with chalk. Measure twice, lay once.
Step 3: Priming the Slabs
This is where DIYers often go wrong. You MUST prime porcelain slabs before laying.
Why? Porcelain's non-porous. Adhesive needs something to grab onto. Primer creates that bond.
How to prime:
- Mix porcelain primer according to manufacturer instructions
- Brush a thin coat onto the back of each slab
- Let it dry (usually 30-60 minutes, check product specs)
- Prime slabs in batches as you work—don't do them all at once days in advance
Yes, it's an extra step. Yes, it's essential. Skip it and your slabs will lift. Guaranteed.
Step 4: Mixing and Applying Adhesive
Use porcelain-specific adhesive. Not standard tile adhesive. Not cement. Porcelain adhesive. It's formulated for the low porosity and weight of these slabs.
Mixing:
- Add powder to water (not water to powder—causes lumps)
- Mix to a thick, butter-like consistency
- Only mix what you can use in 30-40 minutes
- Keep your bucket clean between batches
Applying:
- Spread adhesive on the concrete base using the flat side of your trowel
- Comb through with the notched side, creating consistent ridges
- Apply adhesive thickness of 10-15mm minimum
- Cover an area you can complete in 20 minutes (adhesive starts skinning over)
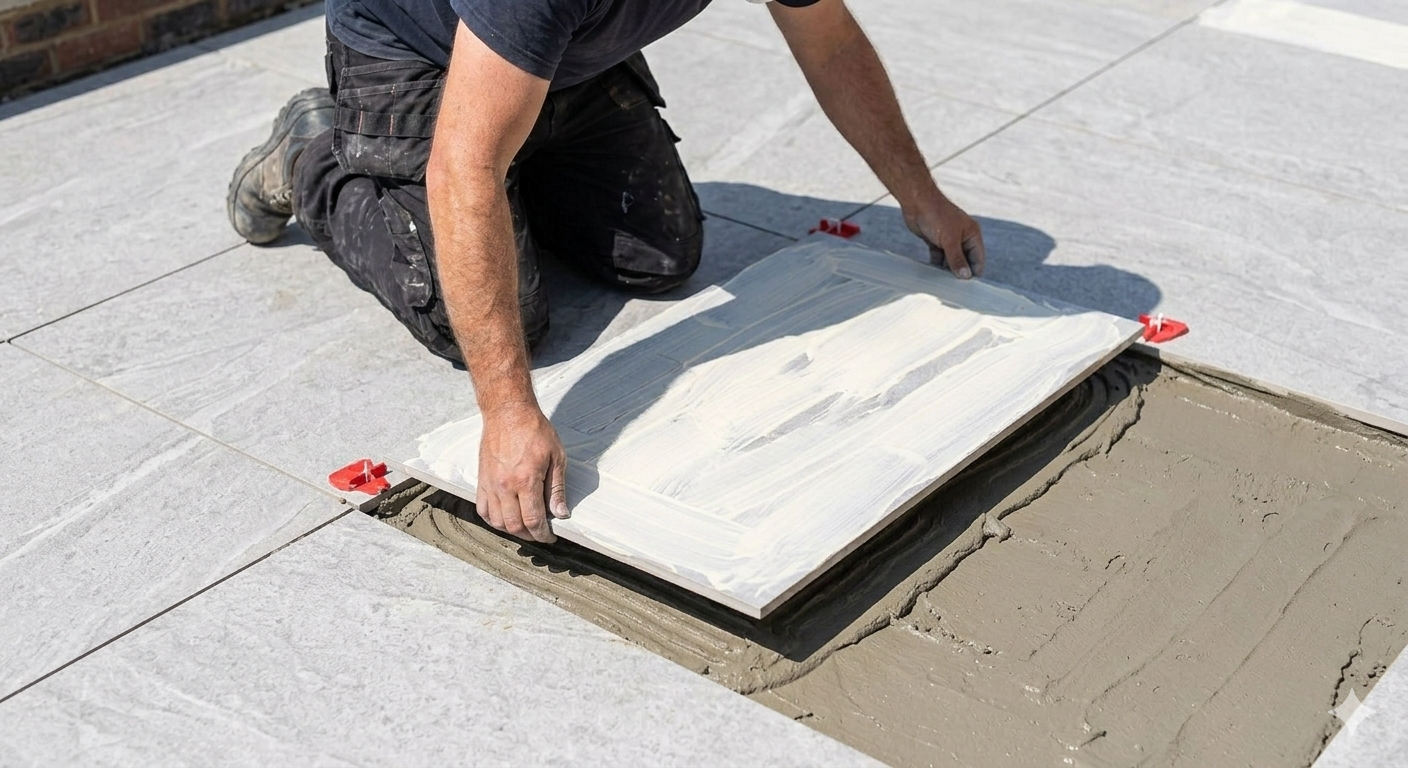
Back buttering: For extra security, also apply a thin layer of adhesive to the back of each primed slab. This is called "back buttering" and ensures 100% coverage.

Step 5: Laying the Slabs
Right, here's where it gets real.
Positioning:
- Lower the slab onto the adhesive bed—don't slide it into position
- Gently press down, working air out from the center
- Use your rubber mallet to bed it firmly (gentle taps, not whacks)
- Check level immediately with your spirit level
- Adjust now while adhesive is workable
Spacing:
Use tile spacers to maintain consistent 3-5mm joints. Don't butt them tight together—you need expansion joints with porcelain.
Leveling:
Check level in all directions:
- Across the slab itself
- Against adjacent slabs
- Along the drainage fall
Every. Single. Slab. Sounds tedious? It is. But it's the difference between professional-looking work and an obvious DIY bodge.
Working systematically:
Lay in sections. Complete 2-3m² fully before moving on. This lets you check alignment and levels while you can still adjust.
Don't kneel or walk on newly laid slabs for at least 24 hours. The adhesive needs time to cure properly.

Step 6: Cutting Slabs
You'll need to cut edge pieces and corners. Wet cutting is mandatory.
Cutting process:
- Measure twice, mark clearly with pencil
- Set up wet cutter with porcelain-grade blade
- Keep water flowing constantly (prevents dust and blade damage)
- Cut slowly and steadily—porcelain's hard, rushing causes chips
- Wear safety goggles and dust mask
- Keep cut edges away from prominent sightlines where possible
Common cuts for 900x600mm:
- Half slabs (450x600mm) for brick bond patterns
- Custom edge pieces to finish against walls/borders
- Corner notches for drains or obstacles
Clean cuts matter. Rough edges look amateur and can be sharp.
Step 7: Grouting and Finishing
Leave slabs for minimum 24 hours (48 hours better) before grouting. The adhesive must fully cure.
Grouting process:
- Remove all tile spacers
- Ensure joints are clean and free from adhesive residue
- Mix porcelain grout to manufacturer specs
- Work grout into joints using a rubber float
- Hold float at 45° angle, work diagonally across joints
- Remove excess immediately with damp sponge
- Don't leave grout to dry on surface—porcelain shows everything
Joint width: 3-5mm is standard. Narrower looks cleaner but is harder to achieve consistently. Wider is easier to grout but more visible.
Grout colour: Most choose grey or buff to complement Kandla Grey tones. Contrast grout (white or black) makes a bold statement but shows dirt more.
Sealing: Porcelain doesn't need sealing. The grout joints might benefit from a grout sealer to prevent staining, but the porcelain itself stays sealed forever.
Common Mistakes That Ruin the Job
Using sand and cement bed: This is for natural stone, not porcelain. Porcelain won't bond. It'll hollow-sound and eventually crack.
Dry cutting: Wrecks the blade, creates dangerous silica dust, chips the edges. Never worth it.
Rushing the adhesive: Trying to lay too much area before the adhesive skins over. Work in manageable sections.
Ignoring levels: "I'll sort it later" becomes "I'll live with it forever." Check every slab as you go.
Inconsistent joint widths: Looks amateur. Use spacers religiously.
Walking on fresh work: Disturbs adhesive bond and levels. Exercise patience.
Skipping primer: The #1 DIY failure. Slabs will lift within a year.
When to Hire a Professional
Sometimes DIY isn't the answer:
Large areas (50m²+): The physical workload and time investment becomes overwhelming.
Complex patterns or curves: Herringbone layouts or curved edges need experience.
Sloped sites: Creating proper falls on uneven ground is tricky.
Driveways: Need 30mm slabs and specialist knowledge. Not a first-timer job.
Time pressure: If you need it done in a weekend for an event, pay someone.
No wet cutter access: Buying one for a single job doesn't make financial sense.
Professional installation for Kandla grey porcelain 900x600 costs £50-80/m². Expensive, but guaranteed results and often comes with warranty.
Maintenance After Installation
First 48 hours: Don't walk on it. Let everything cure.
First week: Light foot traffic only. No heavy furniture.
First month: Avoid pressure washing—let grout fully harden.
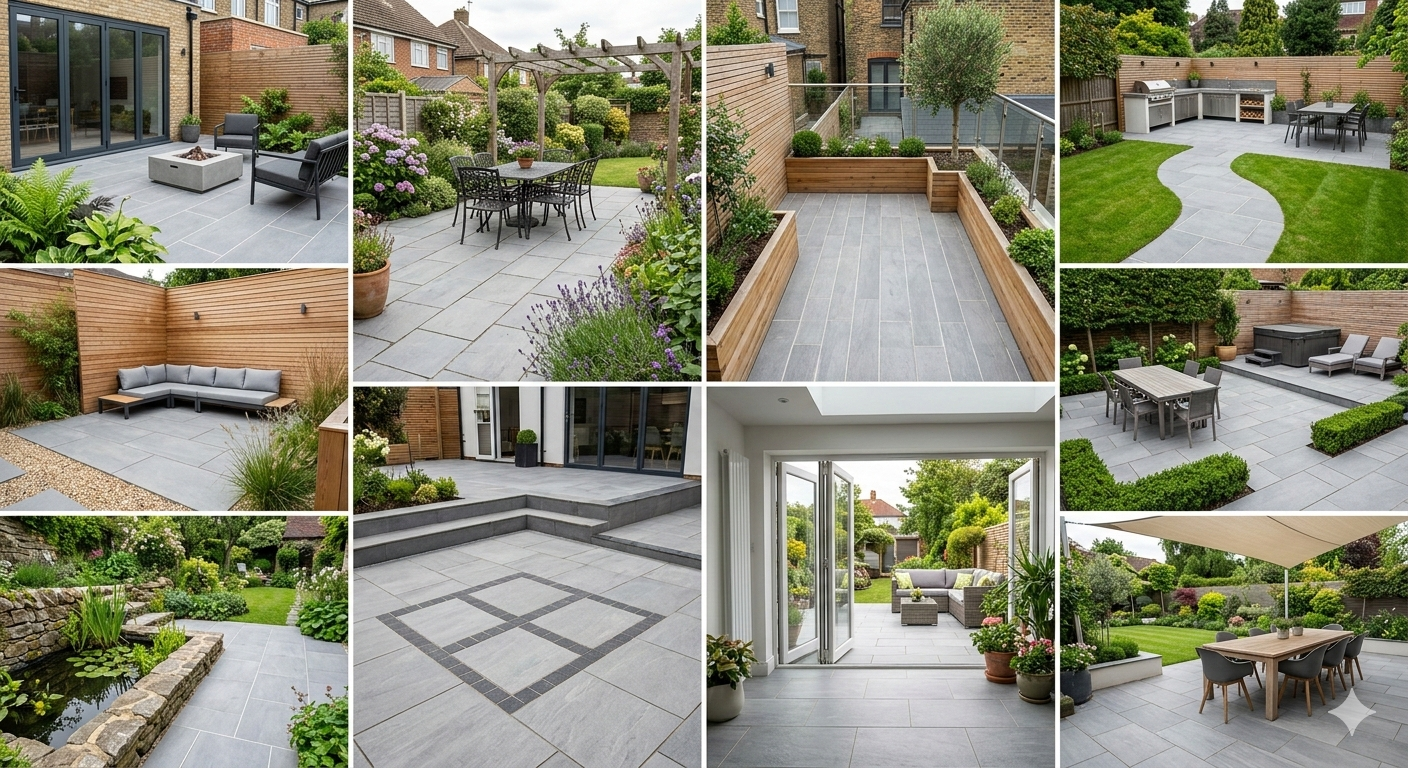
Long-term: Sweep regularly, pressure wash 1-2 times per year, that's it. Buy Kandla grey porcelain paving and you're buying decades of low maintenance.
Ready to Start Your Project?
Order Kandla grey porcelain 900x600 from Universal Paving UK and you're getting:
- Premium R11-rated slabs at £19.55/m² inc. VAT
- Free UK delivery on most postcodes
- Consistent batches from reliable manufacturing
- 10% extra for cuts and spares (always order this)
- Expert advice on quantities and installation
Order samples first. See the actual colour and texture. Confirm you love it before ordering 30m².
Call 07480959706 with questions about your specific project. Our team knows porcelain installation inside out and can help with quantities, base requirements, and material recommendations.
Shop our full porcelain paving collection online. Order 24/7, delivered within 48 hours from UK stock.
DIY installation saves serious money, but only if done right. Follow this guide, take your time, and you'll have a professional-looking patio that lasts decades.
Let's get it sorted.