


What is the Best Way to Lay Paving Slabs?
In the realm of landscaping and outdoor design, the installation of paving slabs stands as a pivotal task, influencing both the durability and aesthetics of your outdoor space. Whether crafting a serene patio, a welcoming walkway, or a functional driveway, the proper laying of paving slabs is an art that demands attention to detail and adherence to best practices. In this comprehensive guide, we unveil the key steps and techniques to lay paving slabs, providing you with the knowledge and confidence to embark on your paving project.
Planning and Preparation to Lay Paving Slabs: Blueprint for Success
Measuring and Planning for Perfection
Embarking on a paving project demands meticulous planning and precise measurements. This initial stage sets the foundation for a successful endeavor.
- Accurate Measurements: Begin by determining the size of the area to be covered with paving slabs. Accurate measurements of length and width are paramount. Order a slightly surplus amount to accommodate any unexpected mishaps during installation.
- Design Visualization: Contemplate the design and layout of the paving slabs. Whether opting for a classic herringbone or an intricate pattern, visualize how the slabs integrate into the broader landscape design.
Site Preparation: The Canvas Awaits
Once the plans are in place, it's time to prepare the site for the transformative installation of paving slabs.
- Clearing the Canvas: Initiate by clearing the area of any impediments—plants, debris, or clutter. A pristine surface sets the stage for seamless installation.
- Strategic Excavation: Dig the area to the appropriate depth, factoring in the thickness of paving slabs, sub-base, bedding layer, and jointing material. Strive for a depth of 4 to 6 inches, adaptable to project specifics.
- Leveling Mastery: Employ a spirit level and compactor to ensure a level and compacted foundation. This crucial step guarantees stability and prevents future unevenness.
- Weed Prevention: Safeguard your paved haven by laying a weed membrane. This permeable barrier inhibits weed growth while allowing proper water drainage.
Must Read: Where Can I Use Porcelain Pavers Outdoors?
Establishing the Sub-base to Lay Paving Slabs: The Architectural Pillar
Sub-base Construction
The sub-base is the unsung hero of any paving installation, providing stability and resilience to the slabs.
- Laying the Foundation: Introduce a layer of MOT Type 1 aggregate, the cornerstone of a robust sub-base. Evenly distribute and compact the material using a compactor to ensure a solid base.
- Rigorous Compaction: Thoroughly compact the sub-base material, repeating the process to eliminate any potential low or high spots.
- Gradient Mastery: Verify the sub-base's slope, ensuring proper drainage at approximately 1:80. This slope directs water away from the paved area, preventing pooling and potential damage.
Bedding Layer Installation: Crafting the Surface Canvas
Sand Sculpting
The bedding layer serves as the canvas upon which the paving slabs will exhibit their grace. Follow these steps for a flawless bedding layer.
- Strategic Sand Deployment: Blanket the compacted sub-base with a layer of construction sand. The thickness varies based on project requirements, typically between 1 to 2 inches.
- Leveling Artistry: Achieve a level bedding layer using a screed board or a straight piece of wood. Smooth out the surface to create an ideal foundation for the impending slabs.
- Precision Validation: Confirm the accuracy of the bedding layer with a spirit level, ensuring uniformity for the stability and durability of the paving slabs.
Must Read: How to Install Porcelain Patio Pavers in a Backyard?
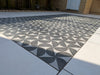
Ways of Laying the Paving Slabs: A Symphony of Elegance
Paving Stone Selection
Choosing the right paving slabs is akin to selecting the protagonists of your outdoor saga. Consider factors like durability, aesthetics, and budget.
- Discerning Choices: Whether natural stone, concrete, or porcelain, opt for slabs of the highest quality suitable for their intended purpose.
- Dry-Laying Deliberation: Prior to adhesive application, lay the slabs in a dry run. Experiment with patterns and alignments, ensuring a visually pleasing arrangement before committing.
- Adhesive Application Precision: Once satisfied with the layout, apply a layer of adhesive or mortar to the bedding layer. Adhere strictly to the manufacturer's instructions for optimal coverage.
- Slab Placement Mastery: Gently place the paving slabs onto the adhesive, starting from one corner and progressing outwards. Secure them in place with a rubber mallet, ensuring level and secure embedding.
- Alignment Vigilance: Regularly check alignment and levelness using a spirit level or straight edge. Adjust as necessary to maintain a harmonious and uniform appearance.
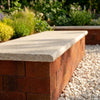
Jointing and Finishing: Sealing the Symphony
Jointing Perfection
With the slabs in place, it's time to fill the gaps and add the finishing touches.
- Jointing Material Selection: Choose the right jointing material, whether wet mortar mix, dry mix, or jointing compound, based on project specifications.
- Meticulous Filling: Fill the joints thoroughly, ensuring compactness. Follow the manufacturer's instructions for the selected material for optimal results.
- Exquisite Clean-Up: Remove excess adhesive, mortar, or jointing material with a brush or damp cloth. This meticulous clean-up enhances the polished appearance of the paved area.
Maintenance and Longevity: Nurturing Your Outdoor Masterpiece
Routine Care Rituals
Ensuring the longevity and allure of your paved area demands consistent care and attention.
- Regular Cleansing: Sweep or hose down the surface regularly to eliminate debris, leaves, and dirt.
- Prompt Stain Intervention: Address spills and stains promptly to prevent them from setting into the paving slabs.
- Protective Measures: Consider applying a sealant or protective coating to enhance durability and resistance to damage.
- Periodic Joint Inspection: Regularly inspect joints, reapplying jointing material as needed to maintain stability and curb weed growth.
- Chemical Caution: Refrain from using harsh chemicals or abrasive cleaners to avoid surface damage.
By adhering to these meticulous steps and embracing a proactive maintenance approach, your paved area will stand as a testament to the harmonious marriage of functionality and aesthetics.
Must Read: How to Clean and Maintain Natural Stone Paving Slabs?
How to Lay Paving Slabs on Concrete?
Here are some tips for laying paving slabs on a concrete surface:
- Clean the concrete thoroughly to remove any dirt, debris, oil or residues that could prevent adhesion. Use a concrete degreaser if needed.
- Level any uneven areas in the concrete with a leveling compound or mortar to create a flat, smooth surface for the pavers.
- Use a concrete primer before laying the slabs. This will help the pavers bond properly to the concrete. Apply primer evenly across the surface.
- Lay a 1-2 inch bed of coarse sand or fine gravel. This helps level the slabs and provides drainage underneath. Compact the sand lightly.
- Set the paving slabs firmly into the sand bedding, maintaining even joint spacing of about 1/4 inch. Use a rubber mallet to tap the pavers into place and get good contact with the sand base.
- Fill joints between slabs with sand. Sweep sand across the surface to fill joints completely. Compact the sand again with a plate compactor or hand tamper.
- For better stability, use concrete adhesive along with the sand bedding to adhere slabs directly to the concrete below. Follow adhesive instructions carefully.
- Consider using polymeric sand in the joints - this sets like mortar and prevents weed growth. Hose it down to activate bonding.
- Seal the paving slab surface once fully set to protect the concrete pavers and improve appearance. Use an appropriate concrete sealer.
- Allow proper time for all materials to cure and adhere fully before using the paved surface.
In Conclusion: Crafting Timeless Outdoor Elegance
In conclusion, the process of laying paving slabs transcends mere construction; it is an artistic journey that transforms your outdoor space. By amalgamating precise planning, thoughtful preparation, and impeccable installation techniques, you can create a durable and visually enchanting paved area. Remember, the choice of high-quality materials, attention to detail, and consistent maintenance are the keystones to ensuring the longevity and beauty of your outdoor masterpiece.
Ready to embark on your own paving odyssey? Connect with Universal Paving, the distinguished paving supplier and manufacturer in the UK. With a commitment to exceeding customer expectations, Universal Paving is your reliable ally for all your paving needs. Initiate your project today and revel in the benefits of a well-laid and beautifully designed paved area.

